Increase Volume Beyond 100% in Windows 10 (5 Methods)

Do you want to increase the volume of your system past the default 100%? Don’t look any further, we’re here to help. Below are the 5 best working methods to give a boost to your Windows 10 maximum volume.
How to Increase Volume Beyond 100% in Windows 10
These methods work on Windows 10 operating desktop computers, as well as laptops. Let’s dive in.
Read: Solved: Volume Icon Missing Windows 10
Quick Tip: One of the easiest ways to increase the volume beyond 100% is by using the volume booster app or using their Chrome extension. It is 100% free & safe to use.
Method 1. Install Sound Booster to Windows 10
One of the easiest ways of boosting your volume past the 100% cap is using a third-party application. Sound Booster is a trusted software capable of increasing your system volume beyond what you thought it was. Letasoft’s application is capable of increasing Windows 10’s default volume by 500%.
All you have to do is navigate to the Letasoft website and download the Sound Booster application by clicking on the Download Now button. After installation, the free trial version of Sound Booster can be used for 14 days.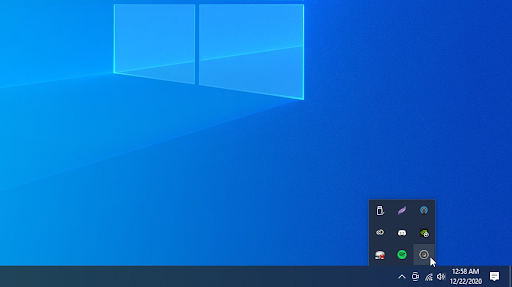
When you launch the application, its control icon will be tucked in your taskbar. Simply click on the arrow to show hidden items, then right-click on the icon shown on the image above.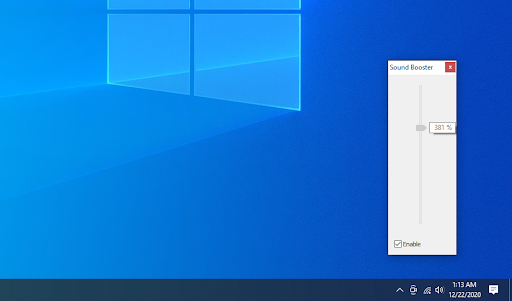
Click Show from the Sound Booster context menu to see the control slider. Slide this up and down to adjust the volume boosting. You can also access different boosting modes in the Settings menu to enhance your experience.
Method 2. Download the Boom 3D Sound Enhancer
Boom 3D is another application we highly recommend for Windows 10 users seeking a volume past 100%. It’s a powerful equalizer with a selection of presets that allow you to boost your volume. You can also create presets yourself and fully customize your sound experience.
After installing the Boom 3D application, open it by using the desktop shortcut or your Start menu. You’ll be greeted by a quick setup screen and a video introduction to the software. Your 14 day long free trial will begin from this point.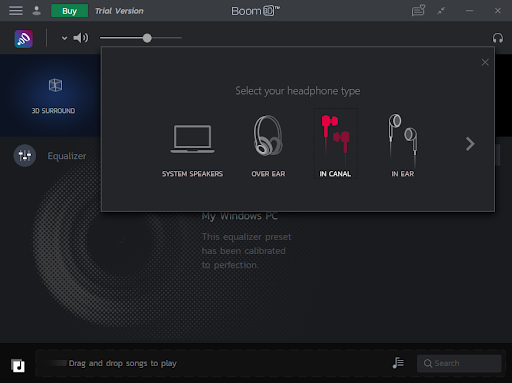
First, click on the headphone icon in the top-right of the window - this will open the Select your headphone type menu. All you have to do is choose the current speakers, headphones, or earbuds you’re using.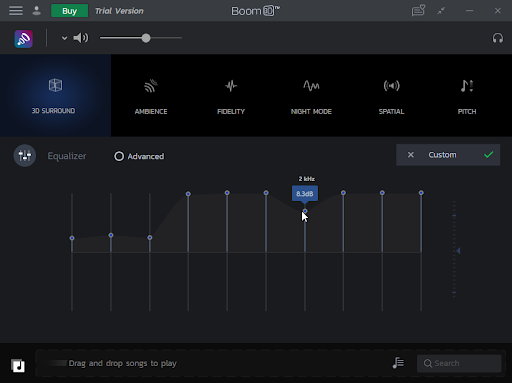
Next, either select a pre-made preset, or create your own to boost your volume. You can also use the volume slider to ensure your system volume is at the highest possible value.
Method 3. Use Windows 10 Loudness Equalizer Alternative
Windows 10 used to come with a built-in equalizer, which allowed users to boost their volume past 100% without having to install a third-party app. However, Microsoft removed this feature in 2019’s KB4497934 update, and we haven’t heard about it since.
Luckily, there’s a great alternative to the Loudness Equalizer: Equalizer APO. This software is able to enhance your volume in real time with little to no latency or CPU usage.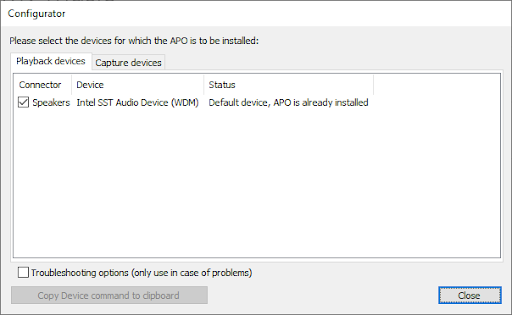
Upon installation, you’ll enter the configuration phase. Simply select whichever devices you want to install Equalizer APO for, then reboot your computer.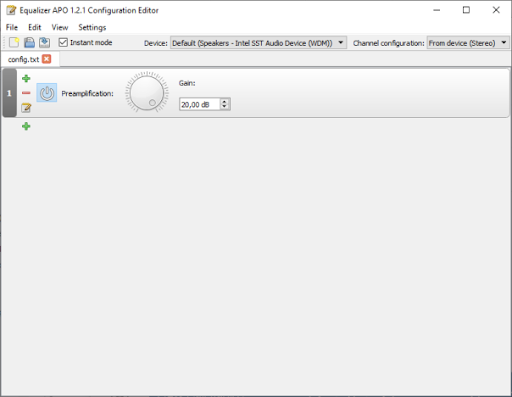
Open the Configuration Editor to change your volume and boost it past Windows 10’s 100% cap. There are plenty of different enhancement options to further customize your listening experience. However, if you only need volume boost, remove the rest of the features using the red minus button.
To increase your volume, just crank up the gain. The maximum is up to +20dB, however, this could cause audio distortion, leading to a significant loss in quality and clarity. To avoid this, gradually increase the gain value until you’re satisfied with the volume.
Method 4. Get a FxSound Application
FxSound is a company focused on providing users with applications that enhance audio in every way possible. They currently list 3 products on their website, one of which is a premium application for sound boosting and enhancements.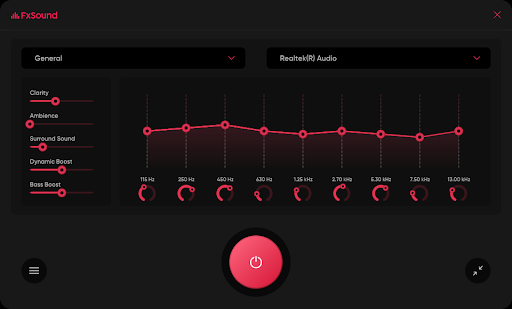
Navigate to the FxSound Downloads page, and choose the application most suitable for your needs. We highly recommend purchasing a license for FxSound Pro (roughly $20 a year) to get ultimate control over your volume and audio.
If you’ve used audio enhancers in the past, you might recognize DFX Audio Enhancer. This software is no longer for sale, but the old freemium versions can still be downloaded from FxSound’s website.
Method 5. Increase Volume in Google Chrome
Many users have raised concerns about Google Chrome volume being too low, specifically on websites like YouTube. Luckily, this is the easiest issue to solve without having to install any applications on Windows 10 itself.
A developer going by the username Alexander Cheng has brought a free Google Chrome extension to help you boost your volume while browsing. It’s called Volume Booster, and you can download it from the Google Web Store.
Simply click on the Add to Chrome button, then open the extensions tab to turn on volume boosting. You’ll notice a blue rectangle next to the volume boosted tab - this indicates that the extension is working.
Just click and drag the slider to increase or decrease the volume of a tab. Once you want to return your volume to the system default, click the Turn Off button.
Read: What Causes “Unmountable Boot Volume” on Windows 10 and How to Fix It
Final thoughts
Thank you for reading up to this far :)
If you need any further help with Windows 10, don’t hesitate to reach out to our customer service team, available 24/7 to assist you.
Return to us for more informative articles all related to productivity and modern day technology!
Would you like to receive promotions, deals, and discounts to get our products for the best price? Don’t forget to subscribe to our newsletter by entering your email address below! Receive the latest technology news in your inbox and be the first to read our tips to become more productive.


