How to Fix “Windows Was Unable to Complete the Format” Error
If you're trying to format a removable drive, such as an SD card or USB drive. You might run into the “Windows was unable to complete the format” error. This can happen for several different reasons — however, it’s nothing you can’t fix. Use our guide to troubleshoot the formatting issue within no more than a few minutes.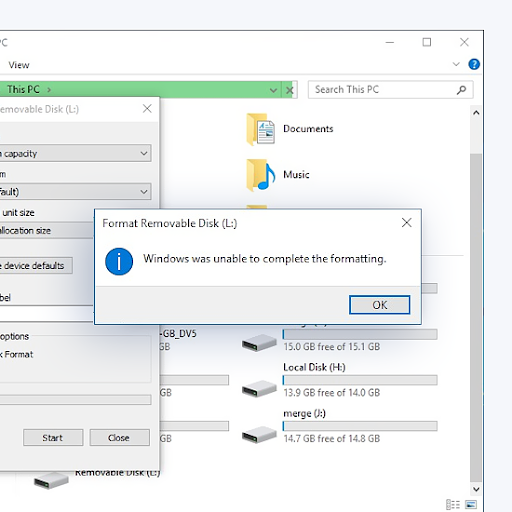
Table of contents
- What causes the “Windows was unable to complete the format” error?
- “Windows was unable to complete the format” error solution
- Method 1. Scan your computer for malware
- Method 2. Use the Command Prompt
- Method 3. Use Disk Management
- Method 4. Check and fix Disk Errors
- Method 5. Disable write-protection
- Final thoughts
What causes the “Windows was unable to complete the format” error?
There can be multiple different causes for this error. Most of the time, it is either related to poor system configuration, or an issue with your drive. In rare cases, even malware can cause this error, especially if it’s on the drive itself.
- The drive is protected. If you or another person applied write protection to the drive, you may not be able to format it, leading to the error. You can easily test this by trying to copy something onto the drive. If you see “The disk is write-protected. Remove the write-protection or use another disk.” then this is the most likely reason.
- The drive is physically damaged. Not all drives can withstand the test of time. Even if no direct damage is visible on the drive itself, it could be suffering from several internal damages. If this is the case, you may consider purchasing a new drive as a replacement.
- The drive is infected with malware. Some attackers often target USB sticks to spread malware. If your drive is currently infected with malware, it could be put out of service by the attacker.
- The drive doesn’t have contents. Windows is unable to format an empty drive. This is because the formatting is based on partitions, as opposed to disk space. If there’s no space occupied, it can’t be broken down into partitions.
These are only some of the common issues that could cause “Windows was unable to complete the format.” Your drive could be suffering from a unique case that’s not listed here — if this is what’s going on, we urge you to try the methods below or get in touch with Microsoft’s Customer Service agents.
“Windows was unable to complete the format” error solution
Depending on your issue, the methods below can fix the error. Please give all of them a try to successfully troubleshoot the issue and format your drives without the error returning soon.
Method 1. Scan your computer for malware
If the cause of “Windows was unable to complete the format” is a pesky malware infection, you can try scanning your computer while the drive is connected. This, in theory, might clear the infection and remove the dangerous malware preventing you from formatting a drive.
To do this, we’re going to use Windows 10’s Defender application. However, for general antivirus purposes, we highly recommend Avast Ultimate for premium protection.
- Plug the affected USB into your computer.
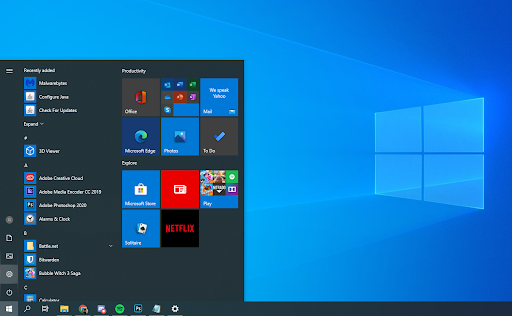
- Open the Settings app by clicking on the gear icon in the Start menu. Alternatively, you can open the app by pressing down the Windows and I keys on your keyboard.
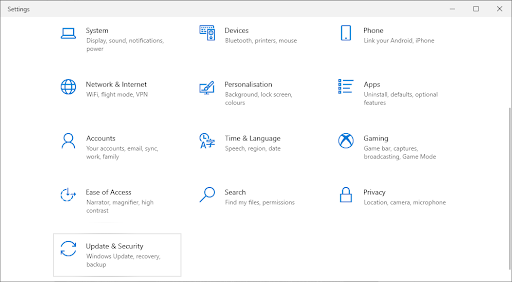
- Click on the Update & Security tile.
- Switch to the Windows Security tab from the menu in the left pane, then click on the Open Windows Security button.
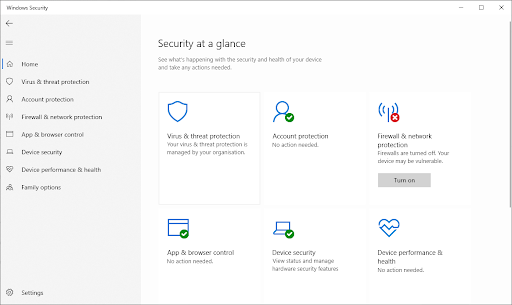
- Click on Virus & threat protection → Scan options. Here, select Custom scan and click on the Scan now button to begin the process.
- Select the correct drive using the left panel, then click on the Select Folder button to begin the scan.
- Follow any on-screen instructions shown to you during the process of the scan. if any malicious files are found on the drive, you can remove them with the help of Windows Defender.
After completing the virus scan, see if the “Windows was unable to complete the format” error still occurs.
Method 2. Use the Command Prompt
You can attempt to format a drive using the command prompt. To accomplish this, simply follow the steps below.
- Press the Windows + R keys on your keyboard. This is going to bring up the Run utility.
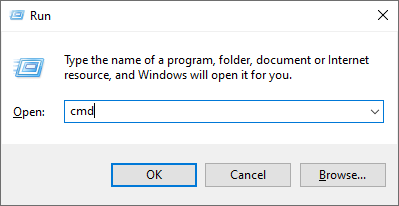
- Type in “cmd” and press the Ctrl + Shift + Enter keys on your keyboard. Doing so, you’re launching the Command Prompt with administrative permissions.
- If prompted by the User Account Control (UAC), click Yes to allow the Command Prompt to make changes on your device. If you don’t have administrative permissions, you might need to ask for help from your admin.
- Type in the following command then adjusts it accordingly to the instructions below. Once done, hit Enter to execute it: format C: /fs:ntfs
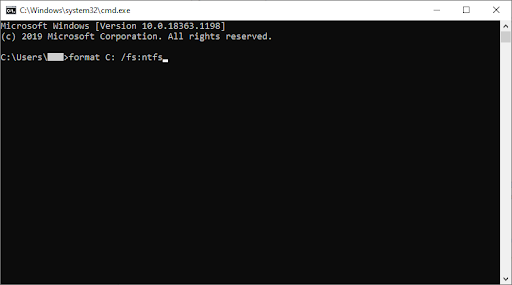
Instructions: In this case, we’re formatting the C: drive with the ntfs file system. However, this might not be the command you need to enter. For example, if you’re trying to format the E: drive in the FAT32 system, you need to change the command to “format E: /fs:FAT32”. - If successful, your drive should be formatted to your needs now.
Method 3. Use Disk Management
If formatting failed with standard formatting and the Command Prompt method, you can try using the Disk Management app. This tool is mostly reserved for advanced needs but provides a tool to easily format drives.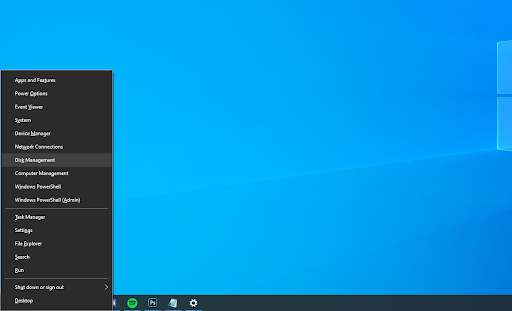
- Press the Windows and X keys on your keyboard at the same time to open the Start menu’s context menu. Here, click on Disk Management.
- Right-click on the drive you want to format, then select Format from the context menu.
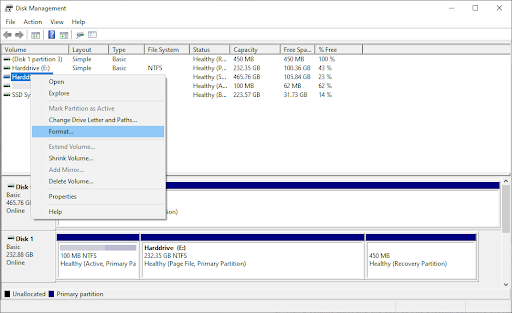
- Pick a Volume label and the desired File System, but leave the Allocation unit size as Default.
- To check for any drive issues, uncheck the Perform a quick format option. Note that this will make the process significantly slower.
- If the formatting is successful, your drive should be formatted properly now.
Method 4. Check and fix Disk Errors
In some cases, your drive could be experiencing errors that cause formatting to fail. Windows 10 comes with a tool that may help you fix this with one click.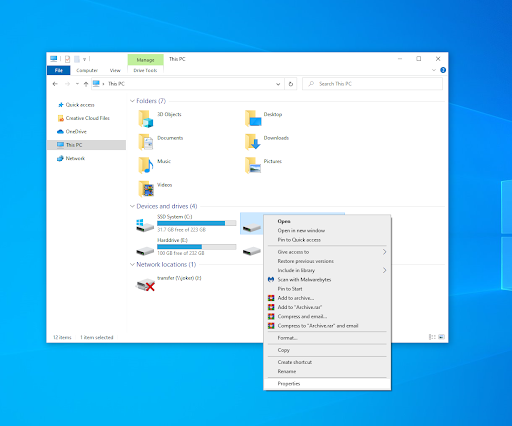
- Open the File Explorer, and click on This PC from the panel on the left side of the window.
- Right-click on the drive affected by the error, then choose Properties. A new window should pop up on your screen.
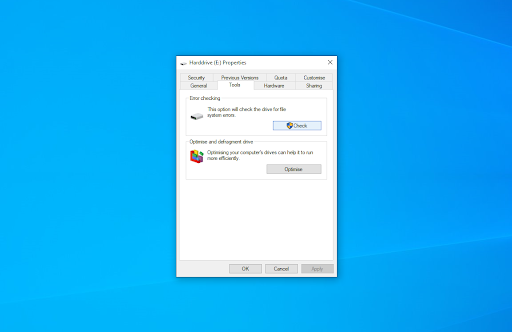
- Switch to the Tools tab.
- Click on the Check button, found in the Error-checking section.
- In the new window, click Repair drive to begin the scanning process. If Windows 10 finds any damage or errors on the drive, it’ll let you know and attempt to fix them.
Method 5. Disable write-protection

(Source: HTW)
If the Windows was unable to complete the format error keeps coming back even after performing all of the methods above, you might want to check if the drive is write-protected. To do so, try and copy a file from your desktop onto the drive. If protection measures are in place, you’ll see the following message:
“The disk is write-protected. Remove the write-protection or use another disk.”
To disable drive protection, locate the write-protection switch. You can slide it upwards to unlock the protection and lift limitations preventing you from formatting the drive.
Final thoughts
If you need any further help, don’t be afraid to reach out to our customer service team, available 24/7 to assist you. Return to us for more informative articles all related to productivity and modern-day technology!
Would you like to receive promotions, deals, and discounts to get our products for the best price? Don’t forget to subscribe to our newsletter by entering your email address below! Receive the latest technology news in your inbox and be the first to read our tips to become more productive.
Related Articles
> Fix Unexpected Store Exception Error in Windows 10 [Updated]
> How to Fix Discord Update Failed Error [Updated]
> Two Finger Scroll Not Working Windows 10 (Fixed)
