Fix: Windows Cannot Access the Specified Device Path/File Windows 10
Windows 10 is one of the latest versions of Microsoft’s extremely popular operating system. Despite bringing many improvements that users love, it comes with a fair amount of errors and bugs that seemingly pop up from nowhere.
One is getting the message “Windows cannot access the specified device path or file” when attempting to open, modify, or delete an application/file.
If you’re having trouble because of this error message, look no further. We’re here to help you identify its causes and apply a fix to get your system back into its working state.

Jump to Section:
- What Causes the “Windows Cannot Access the Specified Device Path or File” Error?
- How To Fix “Windows Cannot Access the Specified Device Path or File.”
- Method 1: Modify the Permission of the File or Folder
- Method 2: Check the File Location
- Method 3: Unblock the File
- Method 4: Recreate the Shortcut to the File
- Method 5: Temporarily Disable Your Third-Party Antivirus
- Conclusion
What Causes the “Windows Cannot Access the Specified Device Path or File” Error?
Just like the majority of Windows 10’s errors, there’s no definitive cause for this one either. However, the user community was able to piece together possible causes that usually lead to the error this article is about. Here’s what we found from various user reports:
- You don't have the right permissions to access the file. Whether intentionally or not, you might not have the required permissions to open/modify the application or file.
- The file location isn't accessible or doesn't exist. The file you’re trying to access may no longer exist on the computer.
- The file has been modified or deleted by malware. When you have malware infections, there’s a possibility that the malicious software will modify or delete your files.
- An antivirus application is blocking your access. Antivirus applications are notorious for leading to Windows 10 errors. You can find a method to ensure your antivirus isn’t causing the error below.
- The file is in a non-accessible external location. If you’ve stored the file on a network or an external hard drive that is no longer properly connected to your PC, you’ll get the “Windows cannot access the specified device path or file” error.
These are only the most common causes known by the community. Your error may have a different source. However, the steps in the next section should help you resolve the issue.
How To Fix “Windows Cannot Access the Specified Device Path or File.”
Now that we’ve identified the majority of possible causes, it’s time to fix the error. You can find various methods below that guide you through the steps necessary to solve issues with Windows 10’s “cannot access the specified device path or file” error.
Note: Some of these methods require you to use an administrator account on your device. This means that the account is able to perform various tasks that may change system settings, which may be required to restore your system.
Don’t know how to change your account to have administrator permissions? Want to create a separate administrator user for purposes like this? We recommend watching “Making a user an administrator on a Windows 10 system” by StormWind Studios to learn how you can make admin users like a pro.
Now, let’s start troubleshooting the “Windows cannot access the specified device path or file” error!
Method 1: Modify the Permission of the File or Folder
It’s very much possible that you can’t access or modify a file because you lack the appropriate permissions to do so.
If you share this computer with others, or it’s in a public location, it’s most likely a measure to make sure nobody is able to harm the device. In this case, contact an administrator and check with them.
However, if the error occurs on your personal computer, you need to fix the permissions yourself. Here’s how to do just that.
- Right-click on the problematic file or folder, then choose Properties.

- Using the tab labels at the top of the window, switch to the Security tab.

- Click on your account listed under Group or user names. This will show what permissions you currently have.
- Click on the Edit button to modify permissions.

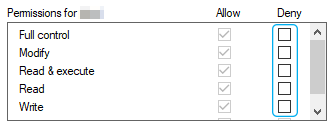
- Make sure to remove all the checks from the Deny column. This will automatically lift all restrictions regarding the file.

- Click the OK button and test if you can open or modify the file after making these changes.
Method 2: Check the File Location
If you’re attempting to use a shortcut to a file, you might be getting the “Windows cannot access the specified device path or file” error because the shortcut currently leads to a nonexistent location.
Let’s check the location of the file and verify that it exists by doing the following steps.
- Right-click on the problematic file or folder, then choose Properties.

- Make sure you’re on the default General tab. Here’s where you can find information about a file, folder, or shortcut.

- Check the Location. This will show the path to the file you’re trying to access or modify.

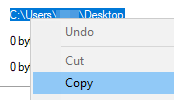
- With your mouse cursor, select the location and right-click on the text. Choose the Copy option from the context menu.

- Open the File Explorer using the icon in your taskbar.

- Click on the header section and insert the location text you copied in Step 4. using the Ctrl + P keyboard shortcut. Press Enter to go to the location of the file.

- Review if you can find the desired file in this location. If you can’t, the most likely thing that has happened is that the file was deleted or moved.
Method 3: Unblock the File
It’s possible that Windows 10 blocked the file in an attempt to protect your computer. Even if the file isn’t malicious, the system may run into false positives and block the file you’re trying to access or modify. When this happens, all you have to do is unblock it by following these simple steps.
- Right-click on the problematic file or folder, then choose Properties.

- Make sure you’re on the default General tab. Here’s where you can find information about a file, folder or shortcut.

- Check if you see the text “This file came from another computer and might be blocked to help protect this computer.” next to the Security section. If you do, place a checkmark next to Unblock.

- Click OK and attempt to access or modify the file again.
Method 4: Recreate the Shortcut to the File
When the location of a shortcut path changes, it doesn’t automatically update. This means you might be trying to launch a shortcut that no longer points to the right file location. In this case, all you have to do is re-create the shortcut.
- Click on an empty space on the Desktop, then choose New → Shortcut.

- Hit the Browse button and locate the file you’re trying to access or modify, then click Next.

- Enter the desired name for the shortcut. This can be anything within Windows 10’s limits, meaning you can’t use specific special characters. Click Finish.

- You should have the working shortcut created on your Desktop.
Method 5: Temporarily Disable Your Third-Party Antivirus
As we mentioned above, a third-party antivirus application may cause this error on your system. Windows 10 users report that many different antivirus applications are able to cause this error, so don’t rule this option out.
The best and safest way of testing this is by temporarily disabling your antivirus and seeing if the error still occurs.
Note: Make sure you turn on Windows Defender while having your third-party antivirus disabled. Defender is a native Windows 10 solution for malware protection, capable of giving you the necessary protection when using your PC.
Here’s how you can temporarily disable an antivirus application.
- Open the Task Manager using one of the following ways:
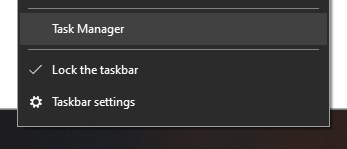
- Right-click on your taskbar and choose Task Manager from the context menu.

- Press the Ctrl + Alt + Del keys on your keyboard and wait for the security options screen to show up. Then, select Task Manager.
- If your Task Manager launched in the compact view, click on the More details option seen in the bottom left of the window.

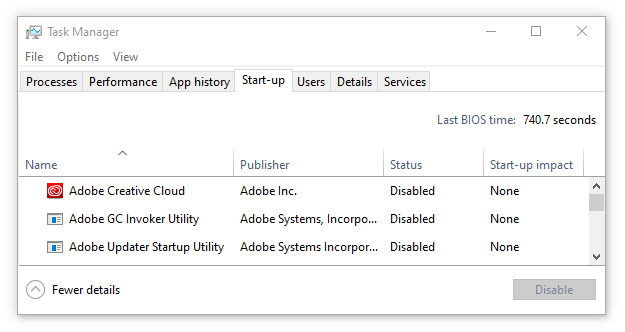
- Switch to the Startup tab at the top of the Task Manager window. Here, you can see all of the applications that start along with your computer at launch.

- Select your third-party antivirus application, then click on the Disable button in the bottom right of the window. The status of the application should change to Disabled.
- Repeat this for every third-party antivirus software installed on your computer, then restart your device.
After completing these steps, your computer will launch without the third-party antivirus software, giving you the ability to check if your issue is resolved.
If you can access, modify, and delete the desired folder/file, it’s most likely that the antivirus app you’ve been using caused the error. We recommend looking for a different application or contacting customer support.
Conclusion
Hopefully, this guide was able to help you get rid of the annoying “Windows cannot access the specified device path or file” error on Windows 10.
If you’re hungry for more information about Microsoft Windows, need help with troubleshooting issues, or want to learn more about your operating system, check out our other articles here.
If you’re looking for a software company you can trust for its integrity and honest business practices, look no further than SoftwareKeep. We are a Microsoft Certified Partner and a BBB Accredited Business that cares about bringing our customers a reliable, satisfying experience on the software products they need. We will be with you before, during, and after all the sales.
One more thing
We’re glad you’ve read this article/blog upto here :) Thank you for reading.
If you have a second, please share this article on your socials; someone else may benefit too.
Subscribe to our newsletter and be the first to read our future articles, reviews, and blog post right in your email inbox. We also offer deals, promotions, and updates on our products and share them via email. You won’t miss one.
