How to Fix Chromium Won’t Uninstall on Windows 10
Chromium is an open-source web browser used and trusted by many Windows 10 gurus. Despite its good reviews and stability in the industry, some users are running into issues when trying to uninstall Chromium. Reports say that users are unable to uninstall the browser in the traditional way, which could lead to more serious issues.
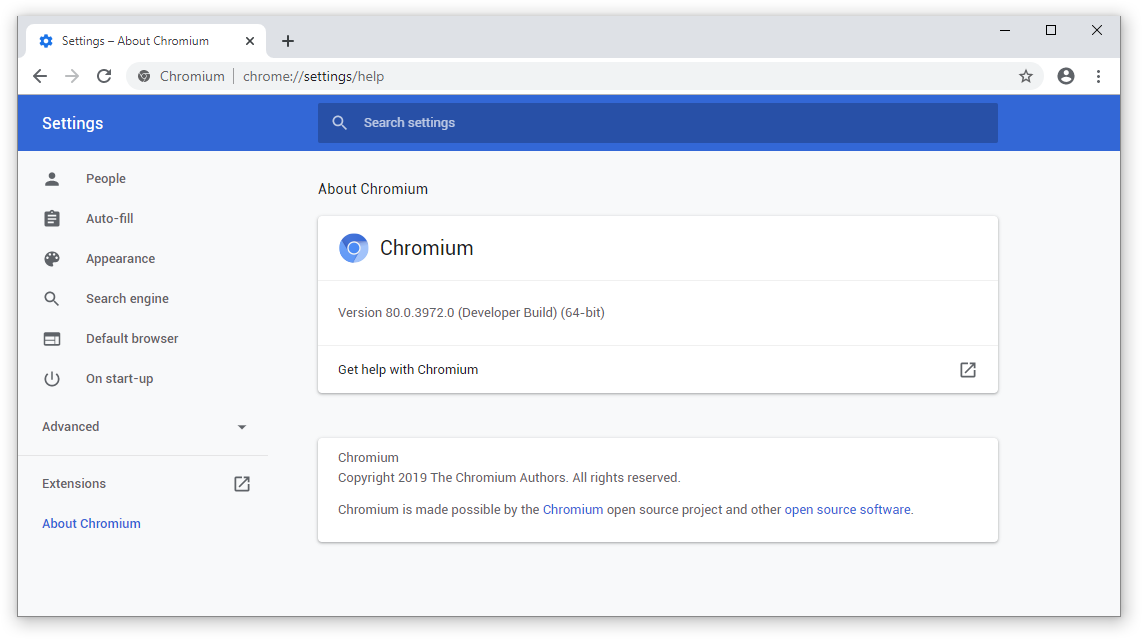
While this issue can be something as simple as an installation glitch, it may be a more serious problem involving malware. If you find that you can’t uninstall Chromium, we recommend following our guides and removing it from your device. Afterward, you can always re-download a legitimate copy of the web browser, or switch to a new one.
Recommended: Which Web Browser Should You Be Using in 2021? (Updated)
In this article, we’ll help you uninstall the software and give some tips on protecting your PC against a possible malware infection as well. If you find that our article was helpful or know someone dealing with Windows 10 issues, don’t forget to share our page!
Jump to Solution:
- What is Chromium and is it malware?
- How to uninstall Chromium using control panel
- Signs that you have Chromium malware
- Method 1: End the running Chromium processes and uninstall manually
- Method 2: Uninstall Chromium from the Control Panel
- Method 3: Delete the Chromium user data folders
- Method 4: Use a third-party uninstaller software to remove Chromium
- Method 5: Reset your browser settings to default
- Method 6: Scan your computer for malware
What is Chromium and is it malware?
Chromium itself is an open-source web browser that is completely free of charge. It’s developed and released by Google, making it an extremely trustworthy application to put on your computer. The vast majority of its code was used as the source code for many of the most popular web browsers, including Google Chrome.
In and of itself, Chromium is not malware and should not be removed immediately. We recommend investigating your process, as well as the Chromium folder to see any red flags that could point to a malware attack.
There are certain types of malware that are capable of disguising themselves as software, incuding browsers. This issue is most prominent with open-source apps, as anybody has access to the developer's code and can modify it. Malicious hackers and malware creators then re-upload the modified version to the internet. This makes downloading browsers from third-party websites very risky.
If your computer has been infected by some type of Chromium malware, you’re most likely unable to uninstall the application because of its modified code. While this isn’t the definite cause for the issue, we recommend that you follow one of our methods to remove the possibly infected software from your device.
How to uninstall Chromium using control panel
- Open the Control Panel, then choose Uninstall a program.
- Select Chromium from the list of programs, and then click on the Uninstall button at the header of the list.
- Click Uninstall in the confirmation dialog box.
- Next, go to your AppData folder and completely uninstall the Chromium folder.
- Empty your Recycle Bin to make sure all Chromium files and folders have been completely removed.
- Finally, restart your computer.
Signs that you have Chromium malware
There are some signs to look out for if you’re not sure about your Chromium browser. We’ve compiled a list of possible signs that signal your computer is infected with this malware. If you recognize any of these issues, we recommend immediately following the next section’s guides to remove the malicious app from your device.
- You installed a known Chromium-based malware browser. There are multiple Chromium-based browsers known to spread malware. Some of these include BoBrowser, eFast, Olcinium, Pelikan, and Qword. These are only some browsers from the many.
- Your computer has Chromium installed even if you didn’t manually download it yourself. If you suddenly see Chromium in your apps list despite never downloading it, it’s possible that a different malicious app installed it. This typically happens with freeware apps, which often pack their installers full of unwanted deals.
- Your default browser has been changed to Chromium without your permission. If you’ve noticed that every link you click opens up in Chromium, that means your default browser has been changed to it. If you didn’t do it yourself, this is a huge red flag.
- You see a sudden influx of ads, pop-ups, and website redirects while browsing. Malware-infected browsers show you a huge quantity of advertisements, pop-ups, and website redirects. These often prompt you to download apps, which most of the time also turn out to be malware.
- Your default search engine has been changed without your permission. By default, your search engine should be something like Google or Bing. If this gets changed to any potentially shady looking search site, you’re most likely dealing with malware.
Whether or not you have a malware-infected copy of Chromium, the methods below have what it takes to remove it from your device. This clears the security risk of Chromium and gives you a clean slate to reinstall a safe Chromium app.
Let’s not waste any time and start troubleshooting!
Method 1: End the running Chromium processes and uninstall manually
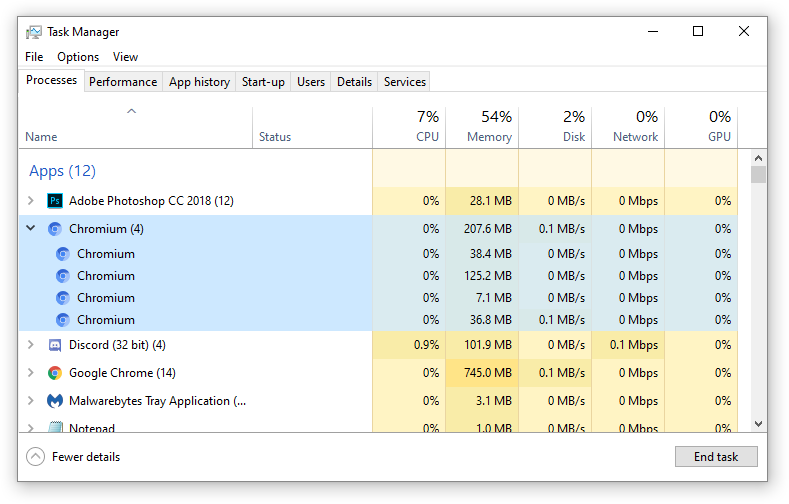
There’s a possibility that you’re simply unable to uninstall Chromium because the process is still running in the background. This happens with a number of other applications as well, especially if it’s allowed to continue running in the background after you close the program.
To combat this, all you have to do is simply end any running Chromium processes manually, then attempt uninstalling again.
- Right-click any empty space in your taskbar, then choose Task Manager from the context menu. Alternatively, use the Ctrl + Shift + Esc keyboard shortcut.
- If the Task Manager launched in compact mode, click on the “More Details” button in the lower-left.
- On the “Processes” tab, locate and single-click on “Chromium.”
- Click on the “End task” button available in the lower-right of the window. Once you see that Chromium has disappeared, you can attempt the uninstall via Settings → Apps.
Method 2: Uninstall Chromium from the Control Panel
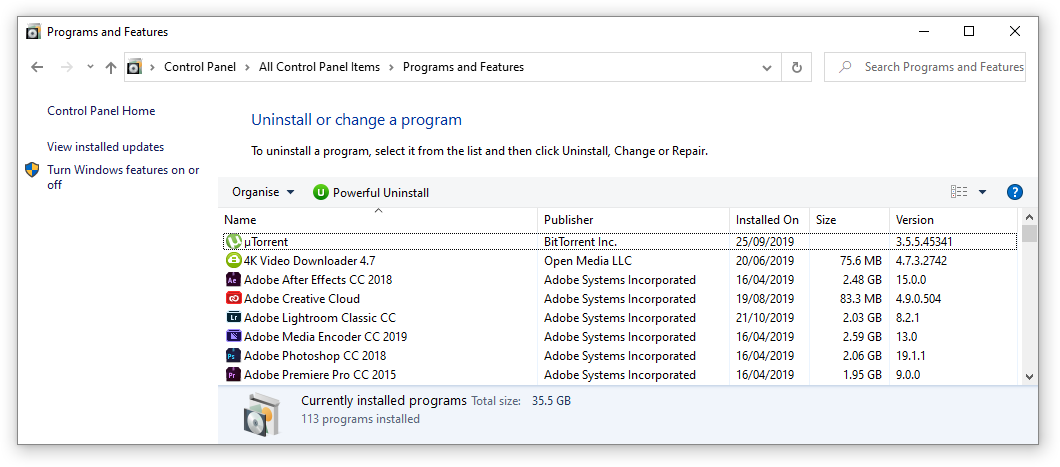
Many Windows 10 users don’t even realize that the classic Control Panel featured in iconic operating systems such as Windows XP and Windows 7 is still available today. You can’t access it as easily as before, mainly due to the fact that the Settings app has taken its spot, but it’s still there. And it’s still just as useful as ever.
Rather than using the uninstaller shortcut or going into the Settings app, try using the Control Panel. You may be able to uninstall Chromium
- Press the Windows + R keys on your keyboard simultaneously to launch the Run application.
- Type in the word “control” then click the OK button or press Enter on your keyboard. This will bring up the classic Control Panel.
- Ensure that your view mode is set to either “Small icons” or “Large icons” to make sure you see all Control Panel items.
- Click on “Programs and Features” from the available menus.
- Locate “Chromium” and right-click on it once. Select “Uninstall” if available, then follow the on-screen instructions to remove the software.
Method 3: Delete the Chromium user data folders
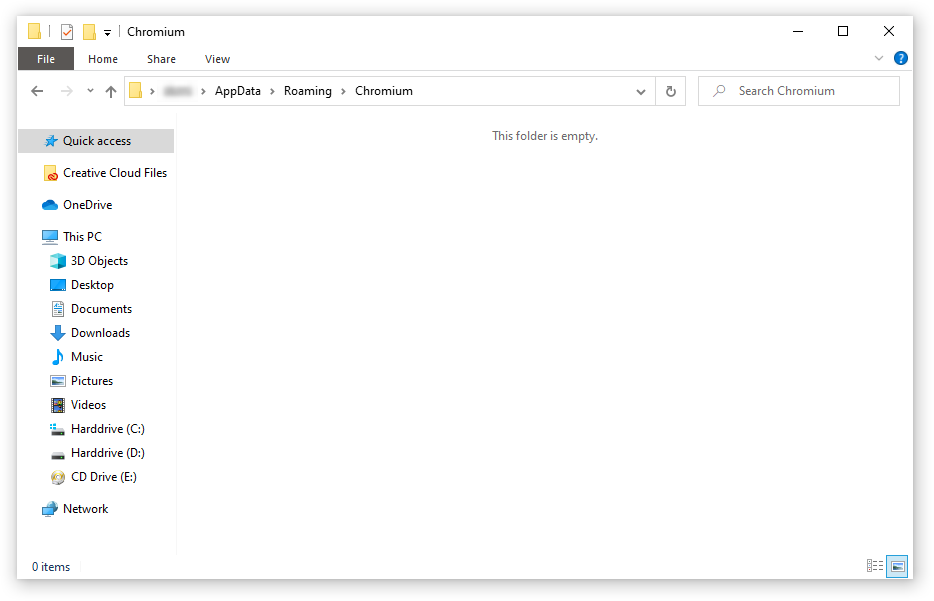
Just about every application on your device stores your individual user data, such as your usernames, cache, and preferences. If Chromium refuses to uninstall, you can attempt to delete this user data folder and try to uninstall the browser again.
Here’s what you need to do.
- Press the Windows + R keys on your keyboard simultaneously to launch the Run application.
- Type “%appdata%” in the input field, then click the OK button or press Enter on your keyboard. This will bring up the File Explorer and automatically navigate you to the AppData → Roaming folder.
- Locate the “Chromium” folder.
- Right-click on the “Chromium” folder, then select “Delete” from the context menu.
- Next, bring up the Run utility using the Windows + R keyboard shortcut once again, and type in “%localappdata%”.
- Find and delete the “Chromium” folder here as well.
- Navigate to your desktop and empty your Recycling Bin. This should remove all the contents of the user data folders from your device.
Method 4: Use a third-party uninstaller software to remove Chromium
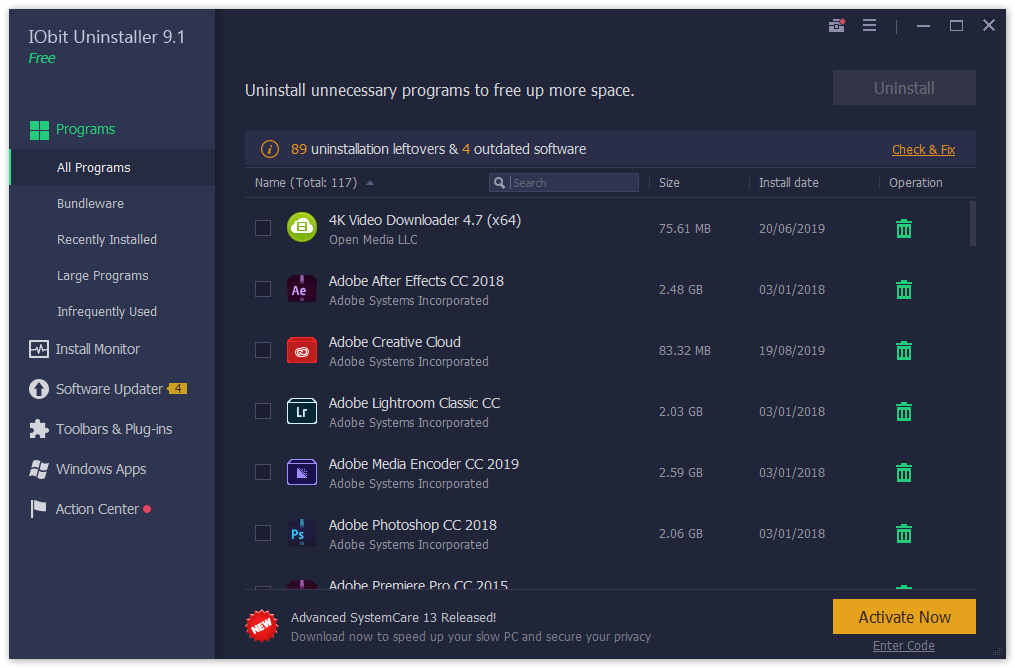
There are a number of third-party applications specifically made to detect and remove all traces of unwanted apps on your system. You can download and install such an app to try and get rid of Chromium as well.
We’ll be installing IObit Uninstaller 9 Free, available for Windows 10. However, you can use any other application you like — the process will be very similar. Follow the steps below.
- Click here to navigate to the official IObit Uninstaller website.
- Click on the “Free download” button displayed on the homepage, then choose the “Download now” option.
- Once your download process has completed, open the installer and install the software according to your needs.
- Launch IObit Uninstaller.
- Use the built-in search to locate “Chromium.”
- A new window will open up within the application. Make sure to check the “Automatically remove residual files” option.
- Click on the application and use the “Uninstall” button to remove Chromium along with any leftover files.
Method 5: Reset your browser settings to default

It’s possible that your default webpage was changed, or you simply noticed some things out of the ordinary with your web browser after installing Chromium. In this case, we recommend resetting your browser to its defaults. Keep in mind that this will get rid of any modified settings, whether it was by you or an app.
Follow the steps below to reset your browser settings to their defaults. We’ll be using Google Chrome to demonstrate, however, the process should be similar on all browsers.
- Open your web browser. Again, we’re using Google Chrome.
- Click on the three dots in the upper right corner of the browser. This is Google Chrome’s “More” menu.
- Select “Settings.”
- Scroll to the bottom of the page, then click on “Advanced.”
- Again, scroll to the bottom until you see “Reset and clean up.”
- Click on “Restore settings to their original defaults.”
- Click on the “Reset settings” button and wait for Google Chrome to relaunch.
Method 6: Scan your computer for malware
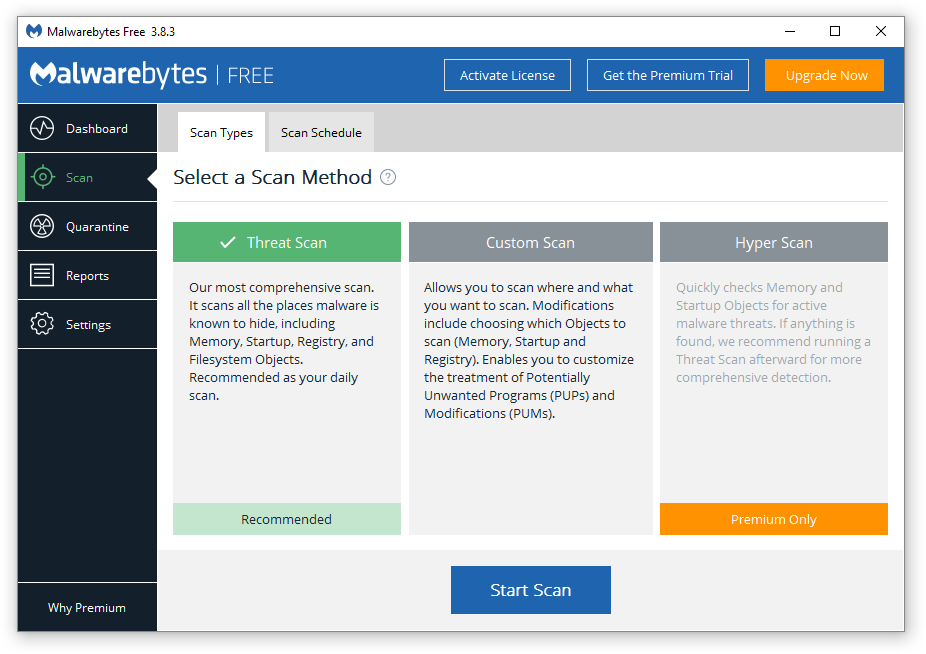
Lastly, a thorough virus scan is definitely your best bet after or during the removal of Chromium. As the chance of an infection is relatively high, it's a good measure to clean up anything left behind by Chromium.
Below is a short guide on how to use Malwarebytes for scanning and removing viruses and other types of malware from your device. However, you can use just about any antivirus app — it’s up to your preference.
- Launch your antivirus application. Again, we’re using Malwarebytes to demonstrate this process.
- Click on the “Scan” option using the application’s left-side menu.
- Click the “Start Scan” button to start a malware scan on your device.
- Wait for Malwarebytes to finish scanning your PC for malware. If any malicious files are found, you can immediately neutralize them by allowing Malwarebytes to put them in quarantine.
- Optionally, allow Malwarebytes to delete the malicious files from your PC.
We hope that these methods were able to guide you through the process of removing Chromium when it won’t uninstall.
Are you interested in learning more about Windows 10? You can browse our dedicated Help Center section for related articles.
